
A Smarter Manaslu Packing Approach: Mastering the September Hybrid Season
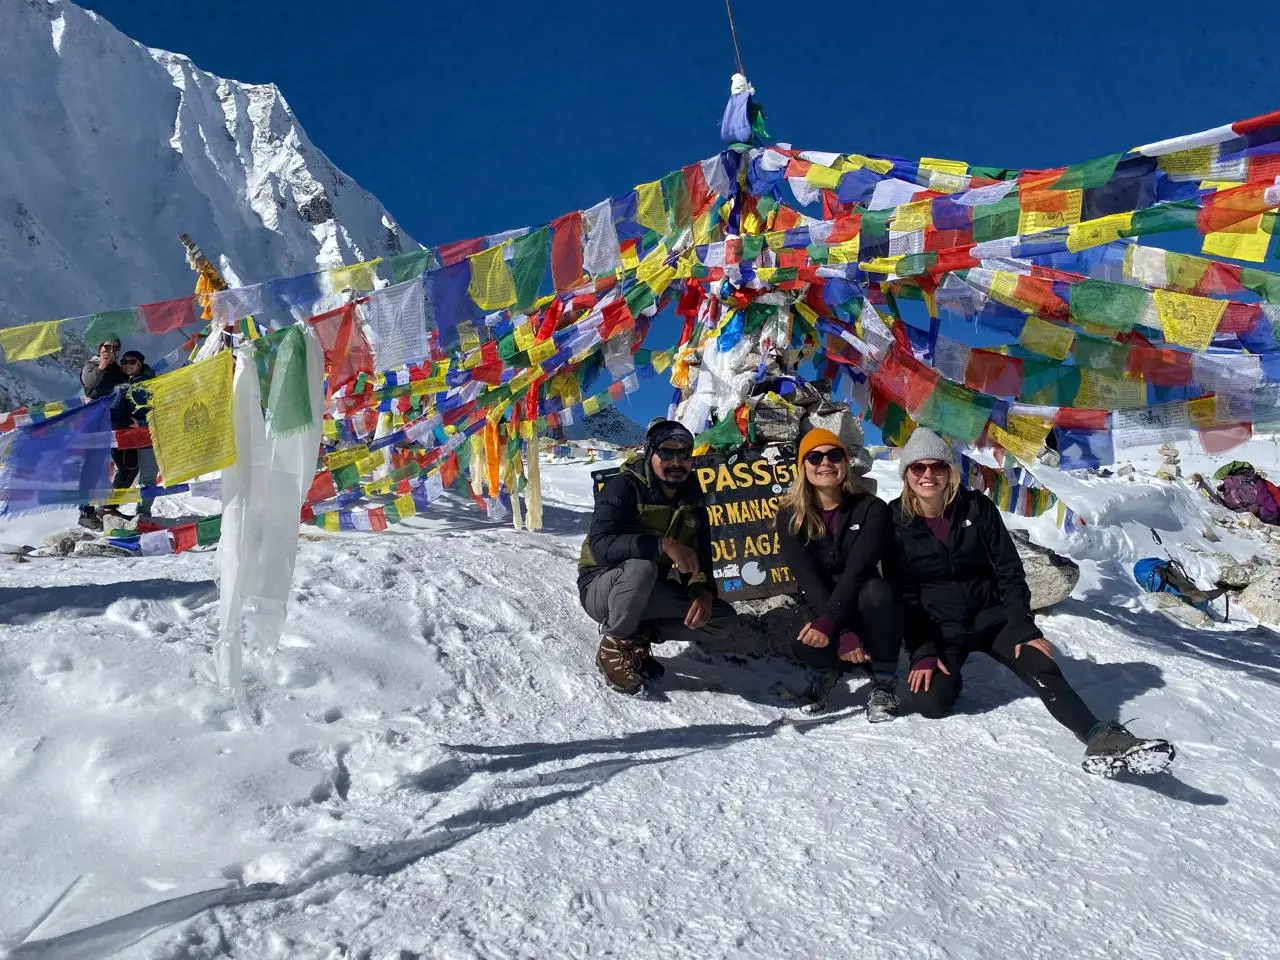
Planning a Manaslu Circuit Trek in September? You’ve picked one of the most interesting — and honestly, one of the trickiest — months to pack for. We always tell our trekkers: September on Manaslu isn’t one trek, it’s two. Down low, around Machha Khola (869m), you’ll still feel the last sticky breath of monsoon — warm, humid, occasionally soggy underfoot. Then, just days later, you’re standing at windswept Larkya Pass (5,106m), where the air turns thin, dry, and genuinely cold. Same trek, two completely different climates, and your packing list needs to work for both.
This is exactly why September trips up so many trekkers who pack based on generic “Himalaya trekking” advice. It’s also why September is nothing like trekking Manaslu in October or November — this is the in-between season, the handoff from monsoon to autumn, and it demands a smarter, more deliberate approach to your Manaslu Circuit Trek gear. Get the layering right, and you’ll move through both worlds comfortably. Get it wrong, and you’ll either be soaked at the bottom or freezing at the top.
Exactly — this trek demands a true hybrid packing strategy, and there’s no way around it.
One day you’re battling sweat and humidity in the river gorges; a few days later you’re standing in snow with temperatures dropping well below zero. That’s the balancing act we help our trekkers nail every season: light, breathable layers for the warm lowlands, paired with serious insulated gear for the alpine stretch. Get this combo right, and the Manaslu Circuit becomes one of the most rewarding treks in Nepal. Get it wrong, and you’ll be miserable — or worse, unsafe.

Here’s the upside, though. Trek in September and you’ll dodge the big October crowds entirely. The Budhi Gandaki riverbanks are still lush and green when you start out, and as you climb higher, the views just keep opening up — culminating in jaw-dropping, crystal-clear sightlines of Mt. Manaslu (8,163m), the world’s eighth-highest peak. Nail your packing — staying cool in the sticky lowland heat without freezing once you hit the high alpine zone — and this restricted, guide-mandatory route (solo trekking isn’t permitted here) turns into one of the most satisfying treks you’ll ever do.
| Elevation Profile | Key Factors Shaping Trail Conditions | Essential Packing Priorities | Recommended Extras – The One Item You Shouldn’t Forget |
| Lower & Mid-Altitude Section (Below 2,500m) | Warm Temperatures, Humid Conditions, and Intermittent Afternoon Showers | Breathable, quick-drying layers for comfort in humid conditions. | Anti-leech protection and a fully waterproof backpack cover for rainy trail sections. |
| High-Altitude Zone (3,500m and Above) | Dry Alpine Conditions, Strong Mountain Winds, and Freezing Temperatures | Cold-Weather Insulation | An expedition-grade sleeping bag (-15°C) and a dependable headlamp for early starts and power outages. |
The Subtropical-to-Alpine Transition Checklist
One more thing worth repeating, because we can’t say it enough: Manaslu runs through a restricted border zone, which means trekking without a licensed local guide isn’t just discouraged — it’s illegal, and frankly, not worth the risk. A good guide does a lot more than walk beside you. They’re tracking weather patterns in real time, especially near Larkya La where conditions can turn fast. They know exactly where landslides tend to hit — areas like Jagat are a classic example — and they keep your trip running smoothly by managing porter loads, making sure no one’s carrying more than the 15kg safety limit.
It’s not bureaucracy for its own sake. It’s what keeps this trek safe and sustainable for everyone walking the trail.
The September Advantage
So why do we keep recommending September to trekkers who ask us about timing? A few solid reasons:
- Fewer crowds on the trail — You’ll share the path with noticeably fewer trekkers than the October-November rush, which means quieter teahouses and more breathing room at viewpoints.
- Greenery you won’t see later in the season — The lower valleys are at their lushest right now. Once autumn sets in, those hillsides fade to brown — so this is genuinely a short window.
- Clear skies after the monsoon clears out — Once the rain tapers off, the air gets washed clean, and you start getting those big, unobstructed mountain views.
- Better rates, more flexibility — Since it’s still shoulder season, teahouse prices tend to be friendlier and you’ve got a bit more room to negotiate or adjust your itinerary on the fly.
Put simply: September gives you a rare window — the lushness of monsoon’s tail end paired with the first hints of crisp autumn skies. It’s a genuinely special time to be on the Manaslu Circuit.
But here’s the catch, and we tell every one of our trekkers this upfront: none of these perks matter if you’re not packed right. You’re moving from the hot, sticky river gorges near Machha Khola to brutally cold alpine terrain at the foot of Mt. Manaslu itself — and that’s not a place to learn the hard way that your gear wasn’t up to the job. A smart, hybrid packing strategy isn’t optional here. It’s what separates a trip you’ll talk about for years from one you just want to forget.
| Manaslu Tsum Valley Trek – 13 Days Trekking in Nepal From To US$ 815 Save US$ 310 | 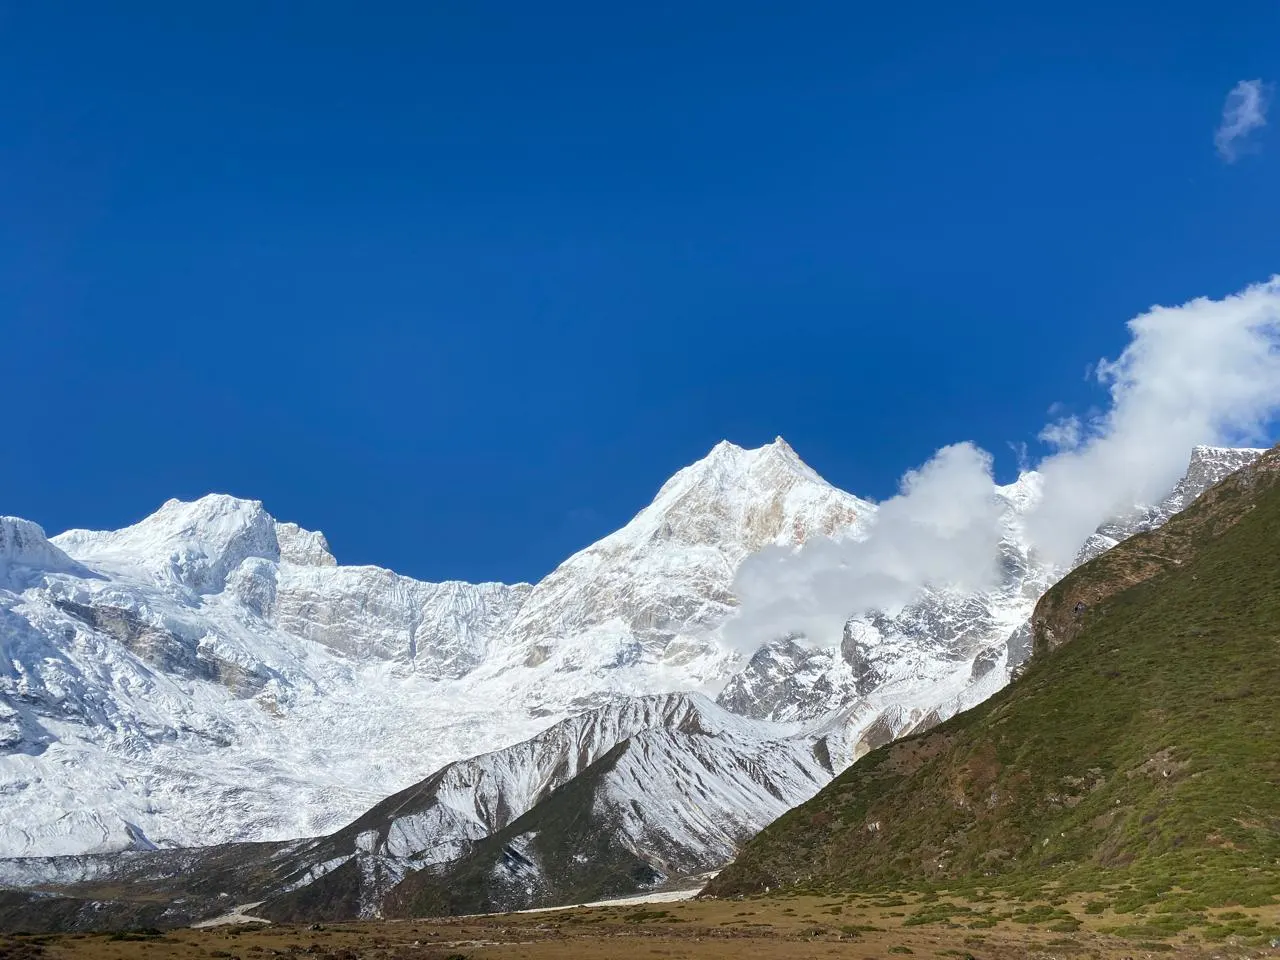 View Trip |
Crushing the Climate Clash: Surviving the Humid Heat of the Budhi Gandaki Gorge
Your trek kicks off at Machha Khola (869m) and climbs steadily up to the old village of Jagat — and these first few days are where a lot of trekkers get caught off guard. As you wind through the narrow, dramatic Budhi Gandaki river gorge, you’re looking at temperatures anywhere from 20°C to a sticky 26°C. But it’s not just the heat — it’s the humidity that really gets you. We tell our trekkers: this isn’t a pleasant warm glow, this is thick, muggy air that makes every step feel twice as hard.
- And just when you’ve found your rhythm, the sky can open up out of nowhere with an afternoon shower, sending you scrambling for cover.
- Bottom line: managing moisture isn’t something you figure out later — it’s something you need sorted from day one.
Why Moisture-Wicking Fabric Is Non-Negotiable
Climbing those steep trails along the river, you’re going to sweat — a lot. The tougher the terrain, the more you’ll be drenched, especially in that humid lower-valley air. This is exactly why we tell every trekker the same thing before they head out: leave the cotton t-shirts at home.
Cotton might feel comfortable on day one, but on the trail it works against you. It soaks up sweat like a sponge, gets heavy fast, and clings to your skin for hours. Worse, the moment a breeze hits that damp fabric, you’ll go from sweaty to genuinely cold in minutes — not a great feeling at 800m, let alone higher up.
Synthetic fabrics like polyester, or merino wool if you want the natural option, are the smarter call here. They pull sweat away from your skin and dry out fast, which means you stay comfortable, avoid chafing, and dodge the blisters that damp clothing tends to cause.
Must-Pack Low-Altitude Base Layer Gear: The “Humidity Buster” Strategy
Here’s what we recommend packing for those sweaty lower-valley days:
Bring three to four lightweight, breathable synthetic t-shirts — and don’t skip the ones with mesh panels, they genuinely make a difference. Throw in one long-sleeve top too. It’s not just there for sun protection in the valley (though it does that well), it also doubles as a light layer if you get caught in a surprise drizzle.
When you’re shopping, look for shirts with underarm gussets or ventilated front panels — anything that lets air move. And honestly, grab the odor-resistant ones if you can. After a few sweaty days on the trail, you’ll thank us.
Pair your tops with quick-dry trekking trousers, ideally convertible ones. They’re a small thing that makes a big difference: zip off the legs when the gorge heat hits, zip them back on the moment the sun drops or the temperature shifts on you — which it will, often within the same afternoon.
| Must-Have Gear | Recommended Specification | Purpose on Warm, Humid Lower Trails |
| Moisture-Wicking Base Layer | Technical Synthetic or Merino Wool Fabric | Wicks Sweat, Enhances Breathability, and Dries Quickly |
| Technical Trekking Pants | Convertible Nylon or Polyester Trekking Pants with a Durable Water-Repellent (DWR) Finish | Adapts to Changing Mountain Weather While Protecting Against Sun and Light Rain. |
| Waterproof Shell Layer | Lightweight Waterproof Hardshell Jacket | Offers Instant Protection from Unexpected Mountain Downpours |
Gear Checklist: Essential Equipment for the Budhi Gandaki Gorge
A Few Hard-Won Tips for the Budhi Gandaki Stretch
These are the little things we’ve picked up over years of guiding this section — small habits that make a real difference:
- Swap your base layer at every major stop, like Jagat. It sounds minor, but trust us, a dry shirt against your skin changes everything for the next few hours.
- Keep your rain jacket at the top of your daypack, not buried at the bottom. Afternoon showers here come on fast, and you don’t want to be digging through your bag while you’re already getting soaked.
- Drink more than you think you need. Humidity has a sneaky way of dehydrating you without the obvious signs of sweat-soaked clothes telling you to.
- Pack leech socks and gaiters — don’t skip this one. The forested sections below Jagat are notorious for leeches, and trekkers who skip this step almost always regret it.
One more thing we can’t stress enough: the Manaslu Circuit is a restricted region, which means trekking independently here isn’t legal — you’ll need a certified local guide with you. And honestly, this isn’t just a formality. Your guide is your single biggest safety asset on this route. They’re reading the weather in real time, steering you clear of landslide-prone sections, and keeping an eye on everything from your porter’s pack weight to the temperature swings waiting for you higher up — the stuff that catches unprepared trekkers off guard.
Quick note: As of 2026, solo trekkers in Manaslu can now get restricted area permits without needing a group of two or more — a welcome update if you’re planning to trek without a larger group.
At the end of the day, tackling the hot, humid Budhi Gandaki gorge in September comes down to one thing: staying ahead of the moisture. Choose quick-drying, moisture-wicking synthetics or merino wool for your base layers, and you’ll start your trek comfortable and confident — which matters, because this is just the warm-up. From here, the trail gets colder and more alpine as you push toward Samagaon and, eventually, the big one: Larkya Pass.
The Great Outer Layer Gamble: Packing for Those Unpredictable Post-Monsoon Spells
Early September still carries the last traces of monsoon along the Budhi Gandaki gorge and down near Machha Khola (869m), so don’t let the calendar fool you — sudden afternoon downpours are still very much on the table. That’s why we tell every trekker the same thing: your outer layer is your MVP this time of year. Get it right, and you stay dry without overheating on the climbs. Get it wrong, and you’re either soaked or sweating buckets — sometimes both in the same afternoon.
The Ultimate Rainproof Gear :
- A lightweight, breathable hardshell jacket — look for 100% Gore-Tex or an equivalent, with fully taped seams and a waterproof rating of 20,000mm or higher. This is the one piece of gear you don’t want to cheap out on.
- A packable trekking poncho — think of it as your backup plan for those sudden, dramatic downpours that hit hard and fast but don’t last long.
- A proper waterproof backpack rain cover (40-60L) — this one’s non-negotiable, full stop. We’ve seen too many soaked sleeping bags and ruined gear from trekkers who skipped this.
| Trekking Gear | Weight Recommendation | Breathability Rating | Weather Protection | Recommended Trail Section |
| Waterproof Shell Jacket | Approx. 300–450 g | Yes | Premium Choice | Designed for Continuous Heavy Rain |
| Ultralight Rain Poncho | Approx. 150–250 g | Moderate | Excellent | Sudden Heavy Downpours |
| Waterproof Pack Cover | Approx. 80–120 g | N/A – Keeps Your Gear Dry | Ultimate Gear Protector | Protecting Essential Trekking Equipment |
Rain Gear Checklist: Essential Protection for Wet-Weather Trekking
Pro Tips for Handling Rain Like You’ve Done This Before
- Put your shell on the moment you see clouds building, not after the first drops fall. It’s far easier than dealing with damp clothes and a miserable, soggy sleeping bag later that night.
- Open those pit zips early on the sweaty climbs. Trapped heat is just as uncomfortable as rain — let your jacket breathe so you don’t end up damp from the inside out.
- Stash your rain cover somewhere you can grab it in seconds — an external pocket, not buried at the bottom of your pack. When the sky opens up, you won’t have time to dig around.
- Test your full rain setup — jacket and cover — before you fly out. Seriously, do this at home. The worst time to discover a broken zipper or a rain cover that doesn’t fit is halfway up a hill in a downpour.
The Wise Words of Local Experts (That’s Our Guides Talking)
Here’s the honest truth: weather in the Budhi Gandaki gorge in early September can flip on you faster than you’d expect. Unless you’ve got a crystal ball handy, your best move is trekking with a certified local guide. Our guides have spent years reading this exact stretch — they spot trouble before it rolls in, time your rest stops to dodge the worst of the afternoon downpours, and know exactly when you’ll get those jaw-dropping views of Mt. Manaslu (8,163m) as the month goes on.
Bottom line: pack a lightweight, breathable hardshell and don’t skip the waterproof backpack cover, and you’re set to stay dry and comfortable through this transitional stretch of weather. Everything else takes care of itself — let the green valleys and dramatic river gorges do their thing, knowing your gear’s got your back no matter what the sky decides to throw at you.
| Manaslu Circuit Trek – 12 Days Trekking in Nepal From To US$ 675 Save US$ 290 | 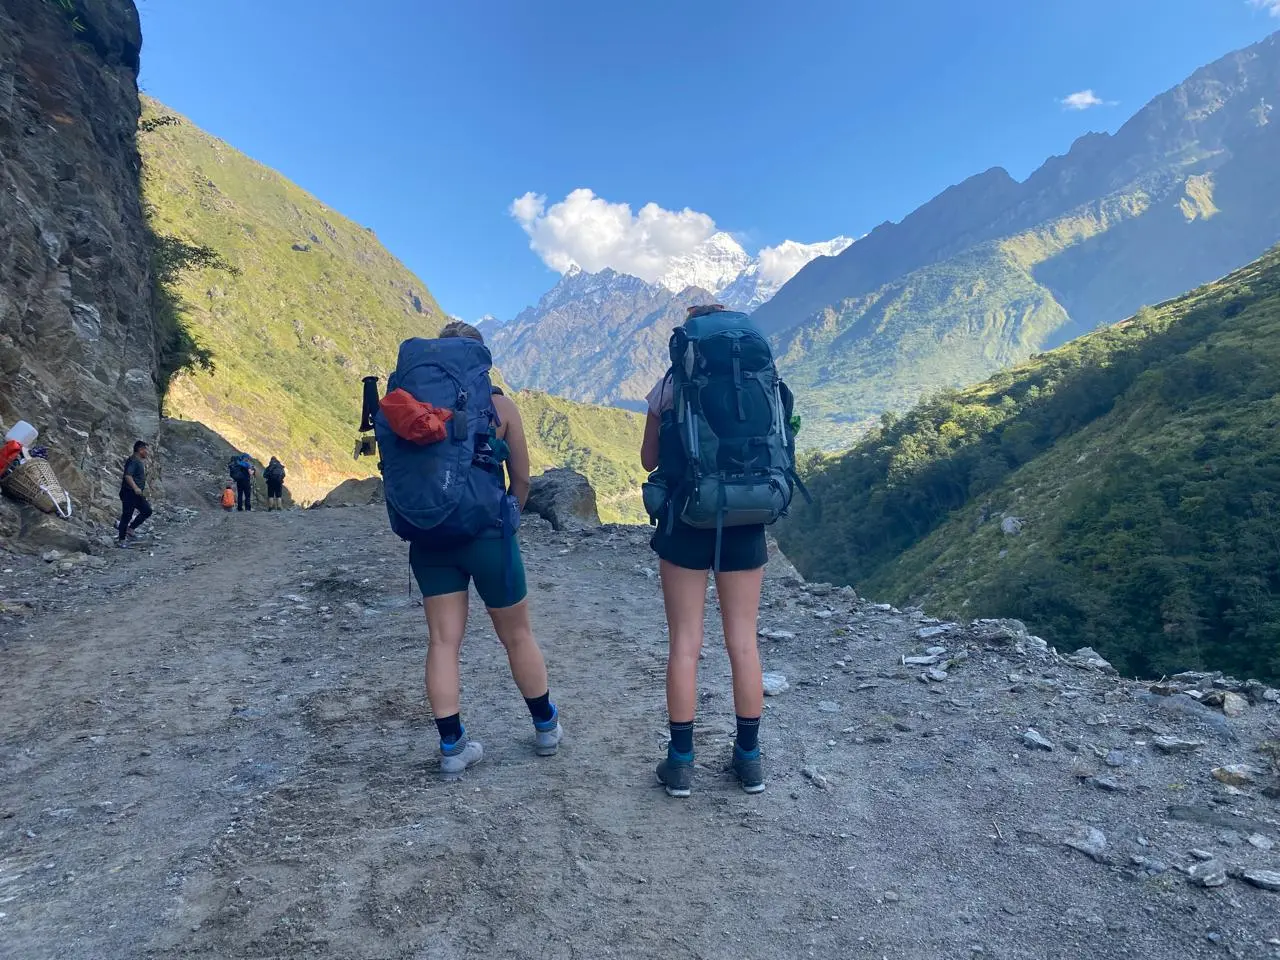 View Trip |
The Stealthy Scoundrel of the Lowlands: Outsmarting Leeches in Early September
Here’s something most first-timers don’t expect: the forested slopes between Tatopani and Philim stay damp well into September, and that means leeches — lots of them. These little guys are sneaky. They’ll latch onto your socks and lower legs on any shaded, shrubby section of trail if you’re not paying attention.
Your Leech-Proofing Game Plan
- Get a proper pair of leech socks. Tight-woven, snug-fitting, worn over your regular hiking socks and tucked into your trousers — think of them as your first line of defense, no gaps for anything to sneak through.
- Carry a small bottle of table salt or a good repellent spray. It’s the fastest, cleanest way to deal with a leech that’s already latched on — and yes, it really is that simple.
- Add lightweight gaiters around your ankles. One more barrier between you and the trail, and honestly, most trekkers who skip this step end up wishing they hadn’t.
- Spray repellent on your boots and ankles before you walk into any damp, overgrown sections. A little prevention here saves you a lot of squeamish moments later.
| Essential Gear | Primary Purpose | Trail Application |
| Anti-Leech Socks | Physical Barrier | Wear Them Over Your Socks and Tuck Your Trousers In. |
| Table Salt | Leech Removal Aid | Apply a Small Amount Directly to the Leech to Encourage It to Detach. |
| Insect Repellent Spray | Insect Protection | Apply to Exposed Skin, Especially Around the Ankles and Lower Legs. |
| Trekking Gaiters | Additional Layer of Protection | Use with Anti-Leech Socks for Maximum Protection. |
Leech & Insect Protection Essentials
Gems of the Trail
- Leeches are most active early in the morning and right after rain. That’s when you need to be especially alert.
- Check your legs regularly — especially after crossing streams or pushing through damp bushes. A quick glance saves you from an unpleasant surprise later.
- Skip lunch breaks in shady, damp corners. Find a dry, sunny spot instead — leeches hate it, and so will you if you sit in the wrong place.
- Wear lighter-colored socks if you can. It sounds small, but spotting a leech against light fabric is so much easier than catching one on dark socks.
Wise Words of Local Experts (Yes, Again!)
The lower trails near the Budhi Gandaki can turn into a leech party in early September, and this is exactly where a licensed local guide earns their keep. They know the hotspots before you even reach them, guide you through smoothly, and share the kind of on-the-ground knowledge you simply won’t find in any blog post — including this one.
Bottom line: leeches are part of the deal in the humid lowland forests on the early-September Manaslu Circuit, but they’re nothing a small, lightweight kit can’t handle. Stay prepared, stay alert, and don’t let a few persistent little critters stop you from enjoying these stunning green valleys before the trail climbs toward Samagaon and the big alpine drama of Larkya La.
Namrung Layering: Dialing In Your Gear Above 2,500 Meters
This is where the trek really starts to feel different. Namrung (2,660m / 8,727ft) is a turning point on the Manaslu Circuit — the thick heat and humidity of the lower Budhi Gandaki finally start to ease off, replaced by cooler air and a noticeable breeze as the valley opens up. This is exactly where we tell trekkers to start rethinking their layers.
Why Namrung Is All About Smart Layering?

You’ll feel the temperature drop the moment you step into shade here, even if the sun’s still strong overhead. It’s the perfect spot to swap toward warmer base layers — but don’t overdo it. The trick is adding just enough warmth without piling on so much that you’re stripping layers off again ten minutes later. This is where your mid-layer starts doing the real work of keeping your core temperature steady.
The Mid-Layer That Actually Works Here
This is fleece jacket territory. Go for something light-to-mid-weight, breathable, with enough stretch that it doesn’t restrict you on the steeper climbs. And honestly, get one with a full zip — being able to vent it open on a hard climb and zip it back up the second you stop moving makes a bigger difference than people expect. Nobody wants to overheat on the way up only to freeze the moment they stop for a break.
| Altitude Zone | Daytime Temperature at This Elevation (°C) | Recommended Layering |
| Low-Altitude Zone (Below 2,500 m) | 18 – 26 | Base Layer with an Optional Waterproof Shell |
| Namrung (2,660m) | 12 – 20 | Base Layer with a Fleece Mid Layer |
| Above Samagaon | 5 – 15 | Base Layer + Insulating Fleece + Waterproof Shell or Down Jacket |
Layering Guide for Namrung :
Namrung Layering Pro Tips
- Keep your fleece somewhere you can grab it fast — a top pocket or the very top of your daypack, not buried at the bottom.
- Put it on during breaks or in shaded sections. The moment you stop moving, the chill catches up with you.
- Take it off the second you start climbing again. You’ll overheat fast otherwise, and that’s how you end up sweaty and then cold.
- Go for something under 400g that packs down small. You’ll be grateful for the extra space and weight saved by the time you’re higher up.
An Insider’s Take
This is really the spot where the trek shifts gears. The slow, sticky heat of the lower trail finally lets go, and Namrung is exactly where a good fleece earns its place in your pack. It’s the bridge between tropical warmth and alpine cold — and it sets you up properly for the colder nights waiting at places like Sama Gaon.
By the time you’re layering an outer shell or down jacket for Samagaon and beyond, you’ll be glad you didn’t skip the fleece back in Namrung — trust us, this is one of those small decisions that pays off for the rest of the trek.
The Alpine Cold Zone: Surviving Freezing Nights in Sama Gaon and Samdo
This is the part of the trek where night doesn’t just arrive — it hits you. Once you cross above 3,500 meters into places like Sama Gaon (3,530m / 11,581ft) and Samdo (3,875m / 12,713ft), temperatures drop well below freezing after dark, and the wind chill turns that cold into something genuinely sharp. This is exactly where your sleeping layer strategy needs to change completely.
Merino Wool Is King (and Queen) at This Altitude
- Leave the cotton behind for good. Once you’re up this high, pure merino wool is the only real choice for sleeping warm.
- It keeps you warm even when damp — and this is merino’s real superpower. Even if you’ve sweated a bit or your sleeping environment isn’t perfectly dry, merino still outperforms synthetics by a wide margin.
- It doesn’t hold onto odor. After several days without laundry facilities, this matters more than you’d think.
- It manages moisture properly, pulling sweat away from your skin so you stay dry — which is essential for keeping your body temperature stable overnight at altitude.
- It’s genuinely comfortable against the skin. Good sleep matters even more up here, and this is one corner you really don’t want to cut when you’re already pushing your body hard each day.
Your High-Altitude Sleep Gear
Here’s a tip we give every trekker: pack a dedicated set of merino wool thermals — top and bottom — used only for sleeping and those cold early mornings before the sun reaches your lodge. Keep these separate from your day clothes. Wash your trekking layers if you need to, but your sleeping thermals stay clean and reserved purely for warmth and rest — they’re too important to compromise on.
Don’t forget a warm hat and a solid pair of wool socks, ideally merino as well. Trust us, after a freezing night in Samdo, you’ll understand exactly why we make such a big deal about this.
| Essential Gear | Material & Key Features | Purpose on the Trail |
| Merino Wool Thermal Base Layer | 100% Merino Wool or High-Merino Blend (200+ GSM) | Thermal Insulation, Moisture Management & Odor Control |
| Merino Wool Trekking Socks | Heavyweight Merino Wool | Keeps Feet Warm in Cold Teahouses and Mountain Lodges. |
| Thermal Sleeping Bag Liner | Silk or Microfleece Liner Material | Enhances Your Sleeping Bag’s Warmth and Overall Comfort. |
| Merino Wool Beanie | Thermal Fleece or Merino Wool | Helps Retain Body Heat Through the Head. |
| Sleeping Bag Temperature Rating | -10 ° C to -15 ° C minimum | Helps Maintain Core Body Temperature During Overnight Stays. |
High-Altitude Sleeping Essentials (Sama Gaon & Samdo – September)
Smart Sleep Strategies for High Altitude
- Change into your dry sleeping thermals the moment you reach the lodge — don’t put it off. This keeps your other layers free of trail dust and sweat, and honestly, you’ll feel better the second you change.
- Pack your sleeping layers in a waterproof stuff sack. Even if your bag gets wet during the day, your night gear stays bone dry.
- Soak up the warmth of the communal dining room for as long as you can before heading to your room. It’s often the warmest spot in the whole lodge.
- Keep drinking water constantly. The cold, dry air up here dehydrates you faster than you’d expect, and staying hydrated actually helps your body regulate its own temperature.
Bottom line: if you’re tackling the Manaslu Circuit in September and pushing on to Sama Gaon or Samdo, a solid set of merino wool thermals is non-negotiable. Think of them as your ticket to warm, dry nights and proper recovery — because you’ll need both before tackling the final, toughest stretch up to Larkya La. Sleep well out there.
Heart Protection in Manaslu’s Shade: Choosing Your High-Altitude Down Jacket
Once Mt. Manaslu’s (8,163m) shadow starts stretching across the trail in the afternoons, your down jacket stops being “nice to have” and becomes the single most important piece of gear in your pack.
Past Sama Gaon (3,530m / 11,581ft) and Samdo (3,875m / 12,713ft), temperatures drop fast, especially once the sun’s gone and you’re sitting in an unheated teahouse dining hall after dusk — that’s when the cold really creeps in.
Why You Can’t Skip This One
Simply put, your down jacket is what gets you through those freezing evenings and bitter early mornings. Look for at least 700-800 fill power — that’s the sweet spot for serious warmth without serious weight. It should pack down small enough to disappear into your daypack, and ideally come with a wind-resistant outer shell, because those valley breezes up here cut right through anything less.
| Key Feature | Recommended Specification | Benefit on the Manaslu Circuit |
| Down Fill Rating | 700-800 | Exceptional Warmth in Sub-Zero Conditions |
| Packed Weight | 300-500g | Easily Carried During Day Hikes |
| Packed Size | Compression Sack Storage | Frees Up Valuable Backpack Space |
| Hood Design & Fit | Fully Adjustable Hood | Enhanced Wind Protection on Exposed Trails | Layer Down Jacket Over Fleece for Cold Evenings and High Camps |
Quick Guide to Down Jacket Selection
Have your down jacket ready to grab for early starts and exposed, windy ridgelines. It layers easily over your mid-layers without feeling bulky, and topped off with a wool beanie and gloves, you’ve got your cold-weather setup sorted.
Bottom line: a good, packable, high-fill-power down jacket isn’t optional for a September Manaslu trek — it’s what gets you comfortably through the cold in Manaslu’s shadow, from the evening chill right through to frosty mornings, without weighing you down during the day.
Footing for Steep Terrain: Boots and Crossing the Glacial Moraine
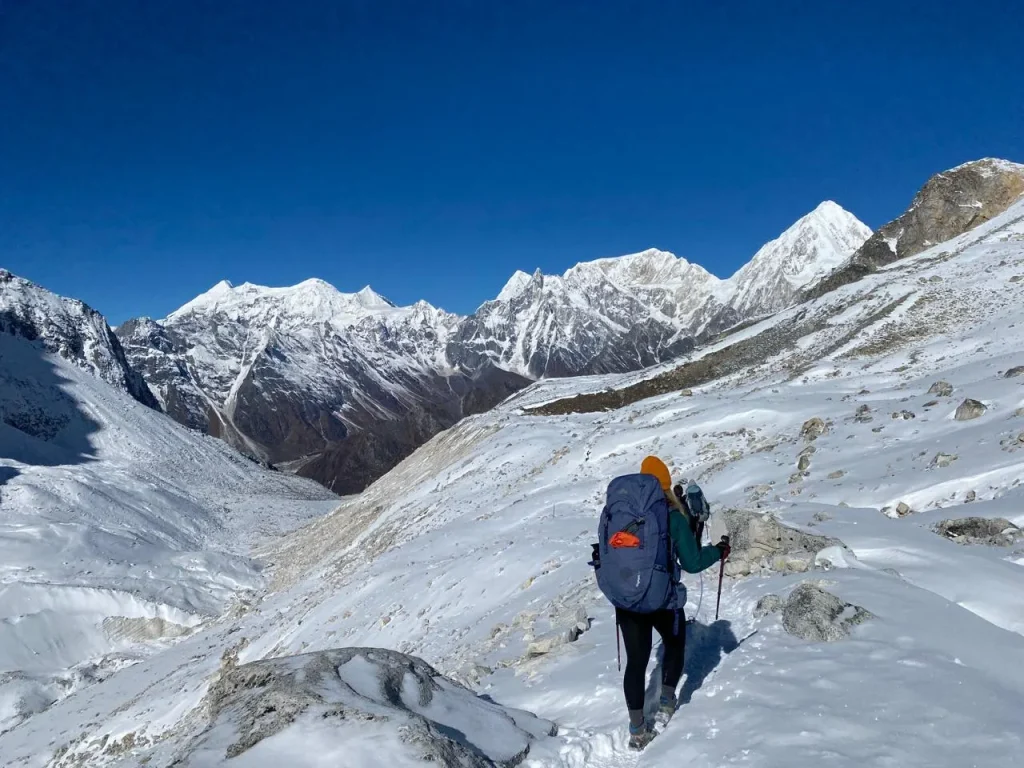
Once you start climbing from Samagaon toward Larkya Pass (5,106m / 16,752ft), the trail changes character completely — you’re now picking your way across steep, loose, scree-covered glacial moraine. This isn’t terrain you want to tackle in the wrong footwear.
What Your Boots Need to Handle This
Go for waterproof hiking boots with solid ankle support — you want something that protects you if your foot rolls on the loose ground, because it will shift under you. Look for an aggressive Vibram-style sole with deep lugs that actually grip on unstable rock, not just look tough.
And here’s the part trekkers underestimate most: break your boots in properly, months before you fly out. We’ve seen too many trekkers spend their trip nursing blisters instead of enjoying the views — and it’s almost always because the boots were fresh out of the box.
| Key Feature | Trail Importance | Recommended Option |
| Waterproof Protection | Keeps Feet Dry on Wet and Rocky Terrain | GORE-TEX® or Equivalent Waterproof Membrane |
| Outsole Grip | Delivers Reliable Grip on Scree and Rocky Terrain | Vibram® Outsole or Deep Multi-Directional Lugs |
| Ankle Stability | Enhances Ankle Stability on Uneven Terrain | Mid- or High-Cut Trekking Boots |
| Boot Weight | Balances Stability and Flexibility | Lightweight to Midweight Construction |
Manaslu Footwear Guide
Boot Breaking and On-Trail Protocols
Start breaking in your boots well before you fly out — go for long hikes back home, not just a few short walks around the block. Pack several pairs of moisture-wicking wool socks, and don’t be shy about using your trekking poles aggressively; they take a surprising amount of strain off your feet on this terrain. Each evening, dry your boots out properly and give them a quick clean before the next day’s climb.
The takeaway here: solid, waterproof boots with aggressive tread — properly broken in before you leave home — are absolutely essential for the loose moraine sections on the Manaslu Circuit in September. Good boots mean better stability, drier feet, fewer blisters, and a lot more energy left over to actually enjoy the views instead of focusing on every step.
Surviving Dharmasala: The Extra Gear You Need for the Last High Camp
Dharmasala, sitting at 4,480m (14,698ft), is your last stop before tackling Larkya La — and it’s not a comfortable one. We’re talking basic stone shelters with no heating, and the blankets provided won’t stand a chance against the sub-zero wind that howls through this exposed valley once the sun goes down. This is one night where bringing your own extra gear genuinely matters.
Why Extra Gear Isn’t Optional at Dharmasala?
Let’s be straight with you: nights here are brutally cold, the wind doesn’t let up, and these stone shelters offer next to nothing in terms of heat retention. And here’s the thing — you genuinely need sleep before tackling the pass. This isn’t the night to skimp on gear.
What We Recommend Packing?
A four-season sleeping bag rated to at least -15°C (5°F) is essential — this isn’t a “nice to have,” it’s the difference between a rough night and a genuinely dangerous one. Add a sleeping bag liner on top for extra warmth and hygiene, and bring a warm beanie and gloves you can wear inside the bag itself if it gets really cold.
Your High-Camp Survival Kit at a Glance
| Item | What to Look For | Why It Matters at Dharmasala |
| Sleeping bag | -15°C, four-season rated | Essential warmth in an unheated stone shelter |
| Sleeping bag liner | Silk or cotton | Adds insulation and keeps things hygienic |
| Beanie & gloves | Wool or fleece | Extra defense against the wind chill |
Bottom line: Dharmasala isn’t a place to wing it. Pack a proper -15°C sleeping bag, a liner, and some solid warm accessories, and you’ll actually get the rest you need before one of the toughest days of the entire trek. This is high camp in the truest sense — you’re not at a hotel, you’re on the edge, and your gear needs to reflect that.
The Pre-Dawn Push: Gearing Up for the Freezing Summit of Larkya La
Crossing Larkya La at 5,106m (16,752ft) is the moment everything on this trek has been building toward. You’ll start climbing in the dark — usually around 4am — with temperatures sitting between -5°C and -10°C and wind ripping through the pass. This is not the section to wing it. Your pre-dawn kit needs to be dialed in.
What You Absolutely Need for the Summit Push?
- A strong headlamp (200+ lumens) with fresh spare batteries. In total darkness, this is your lifeline — don’t risk it with a weak or half-charged one.
- A thick fleece beanie. Your head and ears lose heat fast up here, faster than you’d expect.
- A buff or neck gaiter. Wind and cold hit your face and neck hard at this altitude, and this small piece of kit makes a real difference.
- Windproof, insulated outer gloves — but ones you can still use your trekking poles in. You need warmth without losing the grip and dexterity to handle the terrain safely.
| Essential Gear | Recommended Specification | Pass Day Benefit |
| LED Headlamp (200+ Lumens) | Brightness (Lumens) | Extra Batteries Ensures Safe Navigation in Low-Light Conditions |
| Thermal Trekking Beanie | Heavyweight Fleece or Merino Wool | Minimizes Heat Loss Through the Head |
| Thermal Neck Gaiter | Buff® or Equivalent UV-Protective Fabric | Protects the Face and Neck from Cold Winds |
| Thermal Trekking Gloves | Windproof Construction with Enhanced Grip | Keeps Hands Warm While Maintaining Pole Grip |
Larkya La Pass Gear Checklist
Pass Day Preparation Tips
- Have your whole pack ready to go the night before, back at Dharmasala. The last thing you want at 4am is to be fumbling around in the dark looking for gear.
- Layer up with everything warm you’ve got the moment you start walking. This isn’t the time to “warm up into it” — start fully geared and adjust later if needed.
- Keep snacks and your water bottle within easy reach, not buried at the bottom of your pack. You need fuel and hydration without stopping to dig.
- Pace yourself, and stick to it. This mountain doesn’t care how fit you are back home — steady and consistent wins the day.
Bottom line: the right pre-dawn kit is what turns the Larkya La Pass crossing from a genuinely tough, risky push into a safe, manageable, and honestly unforgettable experience. Pack a solid headlamp, a warm beanie, a buff, and proper windproof gloves, pace yourself with your guide, and you’ll stand at 5,106 meters taking in some of the most spectacular views the Manaslu Circuit has to offer in September.
Spikes? Probably Not Needed (But Worth Packing Anyway): The Larkya La Trail Surface in September
Wondering whether you’ll need crampons or microspikes for Larkya La (5,106m / 16,752ft) in September? Good news — you can relax on this one. September falls outside the snowy window, so the pass is typically dry, rocky, and covered in loose scree rather than ice or snow.
A quick note from us: mountain weather always has a mind of its own, so while spikes aren’t mandatory for a September crossing, we still suggest tossing a lightweight pair in your bag — just in case conditions surprise you.
What the Trail Actually Looks Like in September?
- Dry, rocky, and loose underfoot — expect scree and rocky switchbacks rather than anything icy.
- Any leftover snow from earlier months is long gone by mid-September. By the time most trekkers cross, the pass has dried out completely.
- Travel light and smart — you can skip the extra weight of microspikes or crampons. What you actually want in your hands instead is a good set of collapsible trekking poles.
Why Trekking Poles Beat Spikes This Time of Year?
- Better stability on scree — poles give you real control and balance on the loose, shifting sections heading up to the pass.
- They save your knees — and we mean that seriously, especially on the long, punishing descent down toward Bhimthang (3,590m / 11,778ft).
- Fully adjustable — lengthen or shorten them as you switch between climbing and descending across the pass.
| Essential Gear | Recommended for September | Why It’s Needed? |
| Microspikes or Lightweight Crampons | Nope | Trail conditions are generally dry with minimal ice. |
| Adjustable Trekking Poles | Absolutely! | Enhances Stability on Scree While Reducing Knee Strain |
| Waterproof Trekking Boots | Yes | Helps Keep Feet Dry on Damp Trails and Water Crossings |
| Waterproof Trekking Gaiters | Helpful | Prevents Scree and Debris from Entering Your Boots |
September Larkya La Pass Gear Guide
Tips for Crossing the Pass
- Start early — we’re talking 4am or even before, from Dharmasala. The ground is firmer in the early morning before the day’s traffic and sun soften it up.
- Keep your trekking poles working constantly, not just on the steep bits. They’re earning their keep the entire way across.
- Find a steady rhythm and pace yourself, and stay tuned in to how your body’s reacting. Altitude doesn’t care how fit you are — listen to it.
- Stick close to your guide. They’ve crossed this pass more times than they can count and know every shift in the terrain.
So here’s the recap: you can leave the crampons and microspikes at home for a September Manaslu crossing. This time of year, Larkya La is really about solid footwork on dry rock and scree, backed up by a good pair of trekking poles. Focus on staying hydrated, pacing yourself, and let those poles do the heavy lifting for your knees.
Your Ultimate Manaslu September Packing List and Logistics Cheatsheet
Honestly, September is our favorite window to send trekkers onto the Manaslu Circuit. The lower valleys are still lush and green, the skies clear up beautifully as the monsoon fades out, and there’s just a certain feel to the trail this time of year that’s hard to beat. But here’s the thing we tell everyone before they head out: success on this trek comes down to packing smart, not packing heavy. Think light, efficient, and purposeful — every item in your bag should be earning its place.
Subtropical to Alpine: The Shift in What You Need
| Trek Stage / Elevation | Primary Weather Factor | Clothing Priority | Key Considerations |
| Lower Elevation Trails (Below 2,500m) | Warm, Humid, and Post-Monsoon Conditions | Moisture-Wicking Base Layers and Trekking Shorts | Leech Socks (If Needed) & Waterproof Backpack Cover |
| High-Altitude Trails (Above 3,500m) | Cold, Windy, Sub-Zero Nights | Merino Wool Thermals & Insulated Down Jacket | -15°C Rated Sleeping Bag & Reliable Headlamp |
Important note for trekkers:
Here’s something we tell every trekker upfront: Manaslu is a protected, restricted region, so trekking independently here isn’t just discouraged — it’s actually against the law. Hiring a licensed local guide isn’t just paperwork, either. It’s genuinely your best safeguard on this trek — they manage your logistics, read the weather and trail conditions in real time, and steer you clear of landslide-prone sections before they become a problem.
Your guide also keeps your porters in check, weight-wise. The standard limit is 20kg per porter, and that’s not an arbitrary number — it’s there to keep everyone on the team safe and the trek sustainable for the long run.
| Gear Type | Essential Gear | Target Weight | Importance Level |
| Base Layer Clothing | 3–4 Quick-Dry Moisture-Wicking T-Shirts (Synthetic or Merino Wool) | 1.0-1.5 kg | Must-Have Gear |
| Mid-Layer & Outer Shell System | Fleece Mid-Layer, Waterproof Hardshell, Packable Down Jacket | 2.0-3.0 kg | Must-Have Gear |
| Lower Body Wear & Footwear | Convertible Trekking Pants, Waterproof Hiking Boots, Wool Socks | 2.0-2.5 kg | Must-Have Gear |
| Protection & Support Gear | Waterproof Backpack Cover, Trekking Gaiters, Trekking Poles | 1.0-1.5 kg | Must-Have Gear |
| Sleep System Gear | -15°C Sleeping Bag with Liner & Comfortable Camp Shoes | 1.0-1.5 kg | Must-Have Gear |
| Electronics & Safety Gear | 20,000mAh Power Bank, Headlamp & Complete First Aid Kit | 1.0-1.5 kg | Must-Have Gear |
| Total Pack Weight | – – – | 10-13 kg MAX | Overall Goal |
September Manaslu Packing Checklist (Keep It Lightweight!)
At the end of the day, September is genuinely one of the best months to take on the Manaslu Circuit. Plan smartly around the transitional climate, pack right, and leave the heavy, unnecessary stuff at home — your back will thank you.
Want more than just a packing list?
This is exactly what we do best. Visit View Nepal Treks runs fully supported Manaslu treks — expert guides, guaranteed accommodation, and logistics handled from start to finish, so you can just focus on the trail and the views. Contact us and book your Manaslu Circuit Trek for September today.
Some Most Popular Treks
☞ Upper Mustang Trekking – 14 Days
☞ North Annapurna Base Camp Trek – 10 Days
☞ ABC Trek with Poon Hill -11 Days
☞ Everest Base Camp Short Trek – 9 Days
☞ Luxury Everest Base Camp Trek – 15 Days
☞ Langtang Valley Trek – 12 Days
Manaslu Circuit Trek in September: Your Packing Questions, Answered – FAQs
1. What clothing layers do I actually need for September on Manaslu?
We always tell our trekkers to think in three layers here. The lower valleys stay warm and humid well into September, but once you climb higher, evenings and mornings drop well below freezing. So you’ll want moisture-wicking synthetic base layers, a warm fleece mid-layer, and a waterproof, windproof shell on top. Miss one of these three, and you’ll feel it.
2. Should I pack rain gear for a September trek?
Definitely — don’t skip this. Early September can still bring leftover monsoon showers, so a proper waterproof jacket, rain trousers, and a pack cover all need to be in your bag. We’ve seen too many trekkers caught off guard by an afternoon downpour in the lower gorge.
3. What footwear works best on the Manaslu Circuit in September?
Go with sturdy, waterproof boots with good ankle support, and make sure they’re already broken in before you arrive. The lower trail can get muddy and slippery, while the ground near the pass turns rocky and rough. Pair your boots with quality merino wool hiking socks — your feet will thank you by day five.
4. Do I really need a heavy down jacket if the lower valleys are warm?
Yes, 100%. It might feel unnecessary while you’re sweating through the gorge near Machha Khola, but once you pass Namrung, the temperature drops fast. By the time you’re overnighting in Samdo (3,860m) or Dharmasala (4,460m), that down jacket becomes the thing standing between you and a genuinely miserable night.
5. What sleeping bag rating should I bring?
Don’t go below a four-season bag rated to -15°C (5°F). Most teahouses up here have zero heating, and the nights right before your Larkya Pass crossing get seriously cold — this isn’t a place to undershoot your gear.
6. Are trekking poles worth packing?
Absolutely, and we recommend them to every trekker we guide. They take real pressure off your knees and hips — up to 25% less impact, by some estimates — and they’re a lifesaver on the rocky, uneven ground after the pass and the steep stone stairways lower down the valley.
7. What head and hand gear should make the list?
The sun is still strong down in the valleys, so bring a breathable sun hat for those stretches. Higher up, swap to a warm fleece beanie. For your hands, pack thin liner gloves plus a warmer, windproof outer pair — you’ll be glad to have both options as conditions shift through the day.
8. Backpack or duffel bag — which should I use?
If you’ve got a porter (and on Manaslu, you will), pack your main gear into an 80-100L waterproof duffel bag and carry a separate 30-40L daypack for the things you need on hand — rain gear, snacks, camera, water.
9. How should I handle water purification on the trail?
Skip the bottled water entirely — it’s wasteful and honestly unnecessary. Bring a reusable bottle, ideally with a built-in filter, or purification tablets. Staying properly hydrated also helps fend off altitude sickness, so this matters more than people think.
10. Do I need microspikes or crampons in September?
We’d say pack a lightweight pair just in case. The pass itself is usually dry and snow-free this time of year, but patches of ice or early snow can still show up on the steep northern descent off Larkya La, and it’s better to have them and not need them.
11. What about sun and eye protection at altitude?
The sun hits harder than you’d expect up here. Bring polarized, UV-blocking sunglasses with decent wraparound coverage, plus high-SPF sunscreen and an SPF lip balm. Altitude sunburn sneaks up on people fast.
12. Are quick-dry towels and wet wipes worth packing?
Yes — a compact microfiber towel and a couple packs of biodegradable wet wipes go a long way on nights when hot showers aren’t available (or are pricey), especially once you’re up around Samdo and Dharmasala.
13. What electronics and power solutions should I bring?
Pack a solid power bank — 20,000mAh or higher. Charging at teahouses gets unreliable in September, and cold temperatures drain batteries faster than usual. Tip from us: sleep with your electronics inside your sleeping bag to keep them from losing charge overnight.
14. Should I carry my own first-aid kit, even with a guide?
Yes, always. Your guide will have a kit, but it’s smart to carry your own basics too — blister pads, pain relief, rehydration salts, any personal prescriptions, antibacterial ointment, and Diamox for altitude sickness.
15. What kind of trekking trousers should I pack?
Two pairs of quick-dry trekking trousers, ideally convertible ones. Zip the legs off when it’s hot down low, layer them over your thermals once you’re higher up and the temperature drops. Versatile and saves pack space.
16. Is a headlamp really necessary?
Non-negotiable. You’ll need it for evening arrivals, navigating teahouses during power cuts, and that early 4am start for the Larkya Pass crossing. Pack spare batteries too.
17. Are gaiters worth bringing?
Yes — lightweight, breathable ones are genuinely useful both ends of the trek: muddy ground and leeches down low, loose scree and dust higher up.
18. How many sets of thermal base layers should I pack?
Two sets, ideally synthetic or merino wool. We always suggest keeping one set strictly for sleeping, so you’ve always got something clean and dry to change into at the end of a long day.
19. What snacks should I bring along?
Pack energy-dense, lightweight options — protein bars, trail mix, chocolate, energy gels. These make a real difference on the tougher climbing stretches between meals.
20. What documents do I need to keep secure on the trail?
A waterproof document pouch is essential — keep your passport, printed Restricted Area Permit copies, and visa info inside. Bring a few passport photos too; you’ll need them for additional permits at checkpoints along the way.